How to Quickly Create Labels in Excel/Word
Updated September 2026 with current Word steps, a Google Docs option, printing tips, and answers to common questions.
I’m a pro label maker. Just kidding, I’m not. In this post, I want to share with you how to quickly create labels with Microsoft Excel and Microsoft Word. There is nothing fancy about this. It’s a pretty easy and simple process. I think that teachers, educators, church leadership, and lay staff could appreciate this helpful walk through. I did this process on a Mac, but the idea is the same even if the buttons aren’t in the same place.
Step 1
Create a list in Excel.
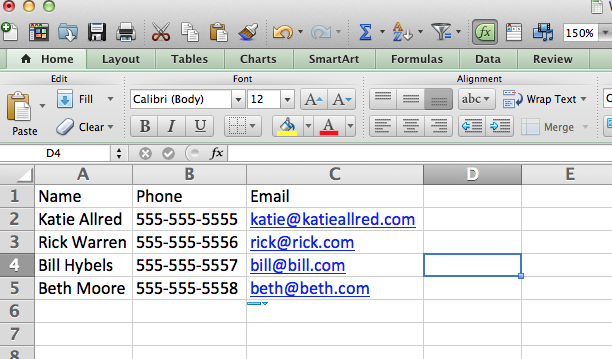
Pretty simple. Now save it somewhere where you can easily locate it. You can’t create labels in Excel without having an Excel spreadsheet first!
Step 2
Now open up Word. Click Tools, Mail Merge Manager (or labels…)
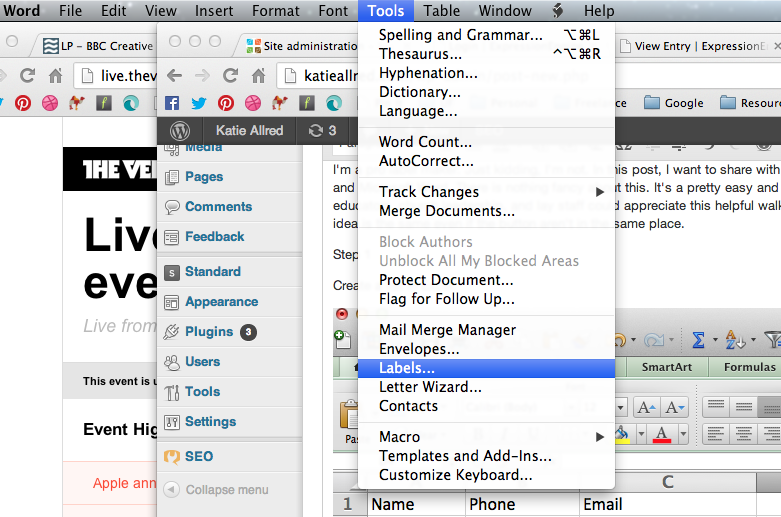
-
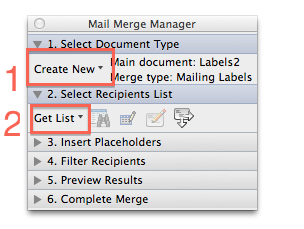
Click Create New, Labels. Pick what type of labels you have.
-
Now click “Get List” and choose Open Data Source… then open your Excel file.
Step 3
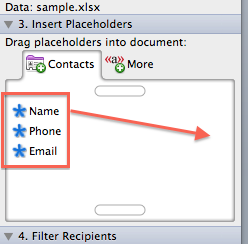
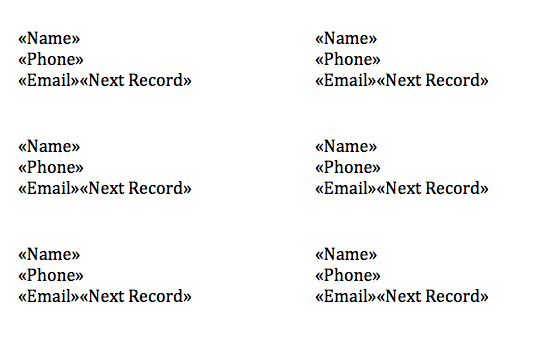
Insert your placeholders. These essentially tell the document where to put things. I drag them over into an entry and then copy and paste them into every little slot. I think that there is a faster way to do this on a Windows machine. Again, the logic is the same. Make sure after each one to put «Next Record».
Step 4
Complete the merge. You can either open up a new documents with your labels or print directly. I like to open mine first.
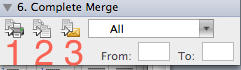
- Merge to New Document
- Merge to Email
When you merge to a New Document, you get this:
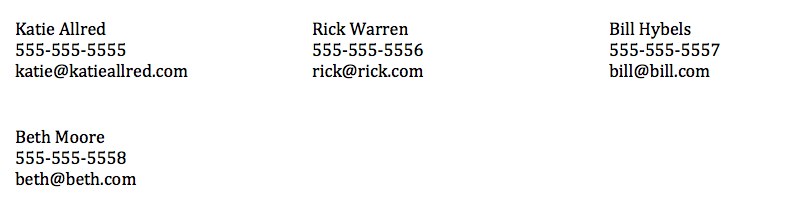
Which you can also print.
That’s all folks!
Need more help? Want a video tutorial? Comment below and let me know!
How to do this in Word today
The screenshots above are from Word for Mac in 2013. The menus have moved since then, but the idea is exactly the same: a list in Excel, a label layout in Word, and a mail merge that connects the two. In current versions of Word (Windows, Mac, and Microsoft 365), everything lives on the Mailings tab.
- Set up your list in Excel. Put a header in the first row (First Name, Last Name, Address, City, State, ZIP) and one person per row after that. No blank rows in the middle.
- Start the merge. In a new Word document, go to Mailings > Start Mail Merge > Labels.
- Pick your label. Choose the brand and product number printed on your label package. For example, Avery 5160 is a common 30-per-sheet address label.
- Connect your list. Click Select Recipients > Use an Existing List and open your Excel file. Choose the sheet your list is on.
- Build the first label. Click in the first label and use Insert Merge Field (or Address Block) to add your fields. Add spaces and line breaks the way you want them to print.
- Fill the rest of the sheet. In Word for Windows, click Update Labels and Word copies your layout to every label, including the Next Record codes. This is the faster way I mentioned in Step 3 above. On a Mac, if your version of Word doesn’t fill the other labels for you, copy and paste the fields into each one like I did.
- Preview. Click Preview Results to see real names in place of the placeholders.
- Finish. Click Finish & Merge and choose Edit Individual Documents to open a new document you can check, or Print Documents to go straight to the printer.
Making labels in Google Docs
Google Docs doesn’t have a built-in label merge, but you still have good options.
- Use an add-on. In Google Docs, go to Extensions > Add-ons > Get add-ons and search for “label merge.” Several add-ons pull names from a Google Sheet into standard label templates.
- Use Avery’s free tool. Avery Design & Print lets you upload a spreadsheet and design labels in your browser, then download a PDF to print. It works with Avery products and many compatible generic labels that list an Avery number.
Tips that save you a sheet of labels
- Print a test on plain paper first. Hold it up to a sheet of labels against a window to check alignment.
- Watch your ZIP codes. Excel drops leading zeros, so 02134 becomes 2134. Format the ZIP column as Text before you type or paste.
- Keep names in separate columns. First and last name in their own columns gives you more flexibility later, like “Dear Sarah” letters.
- Clean the list before you merge. Sort it, remove duplicates, and fix typos in Excel. It’s much easier there than on 300 printed labels.
- Save your label document. Next time, open it, reconnect the updated list, and you’re done in two minutes.
For church offices, teachers, and nonprofits, this is one of those skills that pays for itself every single time you send a mailing. Learn it once, save the file, and let Word do the tedious part.
Frequently asked questions
How do I make labels from an Excel list in Word?
In Word, go to Mailings, Start Mail Merge, Labels, and pick your label type. Click Select Recipients, Use an Existing List, and open your Excel file. Insert your merge fields in the first label, update or copy them to the rest, preview, then Finish and Merge.
Can I make mail merge labels in Google Docs?
Google Docs has no built-in label merge, but add-ons from the Google Workspace Marketplace can merge a Google Sheet into label templates. Avery's free online design tool can also import a spreadsheet and make a printable PDF.
Why are the leading zeros missing from my ZIP codes?
Excel treats ZIP codes as numbers and drops leading zeros. Format the ZIP code column as Text before entering the data, then re-enter or re-import the codes.
Why do my labels print out of alignment?
Make sure the label product number in Word matches your package, set the printer to actual size rather than fit to page, and print a test on plain paper to compare with the label sheet before using the real labels.